Mastering Dam Battlegrounds in ARC Raiders: Map Guide & Strategic Overview
Everything you need to know about the Dam map in ARC Raiders layout, key zones, flanking routes, loot spawn points and winning tactics.
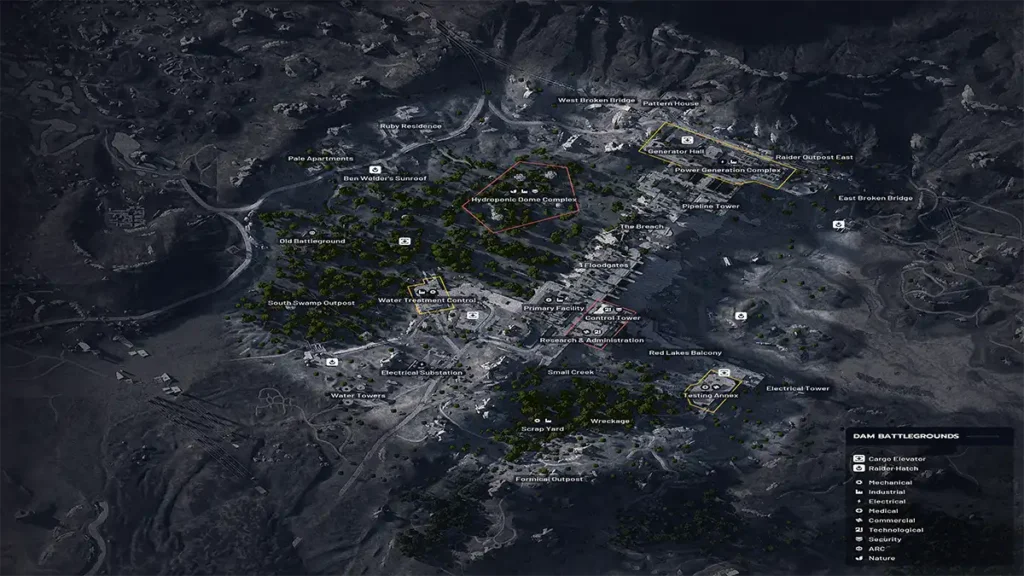
Complete Overview of ARC Raiders Dam Battlegrounds (Layout, Zones & Key Landmarks)
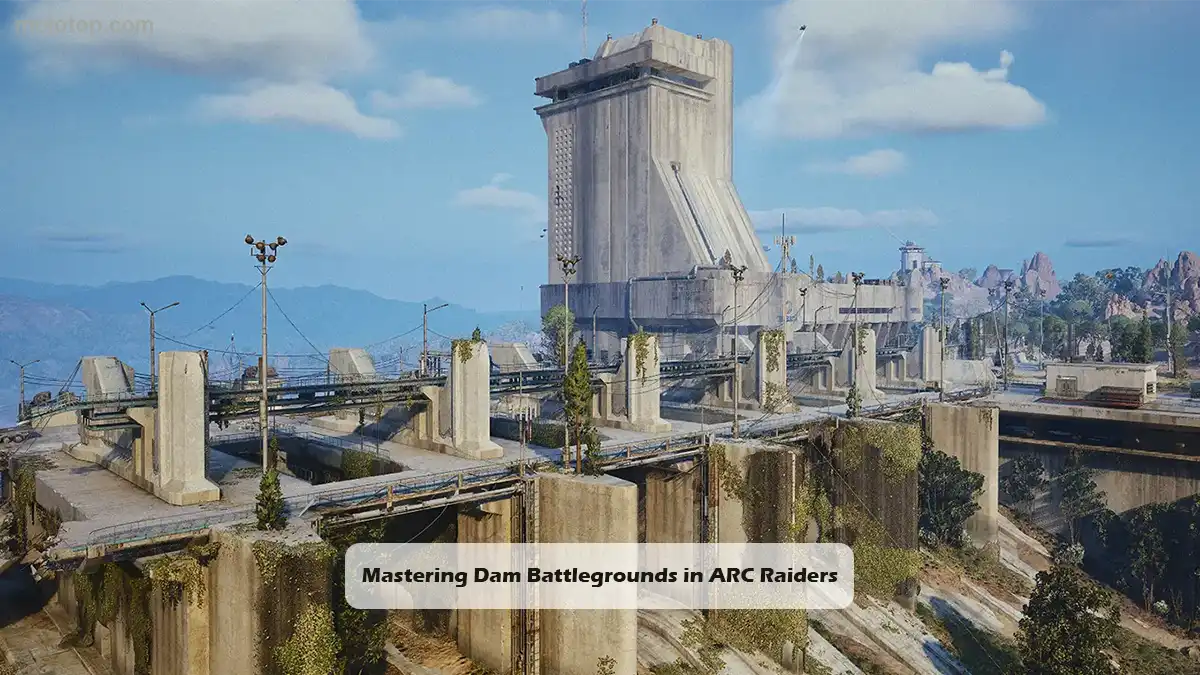
The ARC Raiders Dam Battlegrounds is one of the most strategically layered and visually unique maps in ARC Raiders, offering a combination of vertical combat, open sight-lines, flooded structures and mechanical chokepoints shaped by the massive hydroelectric dam at its center. Understanding this battleground is essential for players looking to create strong positioning, optimize rotations and anticipate enemy movement across the map’s interconnected zones. Because the Dam Battlegrounds blends long-range lanes, ambush corridors and multi-level terrain, it naturally encourages varied playstyles ranging from tactical sniping to aggressive flanking.
At its core, the Dam Battlegrounds is divided into three dominant regions: the Upper Walkways, the Central Spillway, and the Lower Industrial Grounds. Each zone plays a specific role in determining how firefights unfold. The Upper Walkways provide some of the longest sight-lines in ARC Raiders, making them ideal for long-range rifles and overwatch builds. These paths connect key vantage points overlooking major objectives and supply routes, allowing skilled players to control the flow of the battlefield through precision fire. Meanwhile, the Central Spillway acts as the map’s high-risk, high-reward corridor, full of exposed angles, environmental hazards and aggressive close-quarters engagements that punish poor timing.
The Lower Industrial Grounds stand in contrast to the elevated terrain. This area contains maintenance tunnels, submerged machinery rooms and tight metal platforms that force close-range encounters, giving players who favor mobility tools or high-burst weapons a significant advantage. Because the ARC Raiders Dam Battlegrounds mixes vertical layers and narrow interior spaces, the area becomes a hotspot for ambushes, repositioning plays and coordinated pushes when objectives spawn nearby.
Navigating this battleground effectively requires understanding not just the zones but the key landmarks that control combat momentum. Landmarks such as the Overlook Tower, Dam Control Room, and Floodgate Platforms serve as rotational anchors, allowing players to set traps, monitor enemy routes and defend important approach lines. Many of these locations also offer environmental mechanics like elevation boosts, protective cover angles or alternative traversal paths that influence both solo and team strategies within ARC Raiders.
Overall, the Dam Battlegrounds rewards map knowledge, smart movement and awareness of enemy rotations. Its layered terrain and diverse engagement ranges make it one of the most complete competitive environments in ARC Raiders, challenging players to adapt, reposition and leverage every strategic advantage the map provides.

Best Strategies for Surviving & Dominating ARC Raiders Dam Battlegrounds
Mastering ARC Raiders Dam Battlegrounds requires more than strong weapons; it demands map awareness, positioning discipline and strategic decision-making under pressure. This battleground is one of the most complex environments in ARC Raiders, blending tight interior corridors with massive open platforms, long-range sightlines and unpredictable enemy patrol patterns. Whether you’re playing solo or coordinating with a squad, success comes from your ability to read the terrain, anticipate enemy movement and control key positions before ARC machines or raider squads collapse on your location.
One of the defining features of the Dam Battlegrounds map is its layered elevation. Vertical terrain allows skilled players to secure overwatch angles, control approach paths and punish enemies moving through exposed walkways. Securing high platforms early gives you map control, improves survivability and lets you dictate engagements before ARC patrols overwhelm you. Long-range builds thrive here, but close-quarters weapons still perform well inside maintenance tunnels, stairwell choke points and narrow dam corridors where ambushes and flanking routes are common.
To survive extended engagements on this battleground, players must manage movement, cover and extraction routes with precision. The dam’s open decks leave you vulnerable to snipers and ARC drones, so rotating between solid cover, concrete barriers and structural beams is essential. Meanwhile, interior sectors require cautious entry because raiders often set ambushes around corners or on elevated walkways. Knowing when to push, when to reposition and how to break line-of-sight determines whether a fight ends in your favour or forces you into retreat.
For domination-focused strategies in ARC Raiders Dam Battlegrounds, control the central elevation zones, secure vantage platforms overlooking objective areas, and use tactical tools such as recon scanners, shock grenades and mobility gear to stay ahead of enemy waves. These utilities help you track patrol routes, disrupt heavily armoured ARC units and create safe escape lanes when firefights escalate. By blending smart positioning with adaptable combat choices, players can survive longer, win more encounters and consistently outperform enemies across this dynamic battleground in ARC Raiders.
Enemy Behavior, High-Risk Areas & Resource Hotspots
Understanding enemy behavior and learning how to identify danger zones is the foundation of mastering ARC Raiders Dam Battlegrounds, one of the game’s most unpredictable combat environments. Unlike open-field maps where sightlines guide your movement, the Dam introduces vertical terrain, narrow passages, artificial cover, and water-adjacent combat routes that heavily shape how ARC machines and raider groups behave. Anyone aiming to survive this map in ARC Raiders needs to recognize how enemy AI reacts to elevation changes, chokepoints and player noise — because these patterns determine ambush risk and safe rotation paths.
Enemy Behavior Patterns Across the Dam
ARC units show more aggressive patrol cycling in the Dam region due to the map’s confined structure. When players move through high-traffic areas like spillway corridors or turbine walkways, ARC patrols tend to cluster rather than spread, increasing spawn pressure in both close-quarters and mid-range encounters. Raider squads, on the other hand, prefer elevated platforms, scaffolding, and vantage points overlooking the dam’s central basin. This creates layered engagement scenarios where attacks can come from both horizontal angles and vertical cover, a behavior unique to ARC Raiders Dam Battlegrounds.
Elite ARC units often guard extraction routes or resource-dense zones. Their patterns tighten near turbine hubs and control rooms, meaning players who rush objectives will frequently trigger multi-angle engagements. Recognizing these predictable yet punishing behaviors allows you to rotate smarter, conserve ammo, and set up ambushes rather than walking into one.
High-Risk Zones Every Player Should Know
Certain areas of the Dam are naturally more dangerous due to limited escape paths, narrow lanes and elevated enemy positions:
Spillway Tunnel System
These tunnels combine tight corridors with sharp elevation drops, making them prime ambush locations. ARC machines frequently patrol in pairs here, creating unavoidable close-range engagements that favor burst damage but punish poor positioning.
Upper Dam Walkways
These elevated platforms grant strong map control but expose you to long-range fire from raiders and ARC snipers. The metal railings provide partial cover but are unreliable in heavy firefights, increasing risk during rotations.
Central Basin & Lower Platforms
The open-area sections of ARC RaidersDam Battlegrounds force players into mid-range combat with limited vertical escape. ARC drones and ranged units often lock onto players crossing these zones, turning them into high-pressure lanes.
Engine Room & Turbine Control Areas
Dense enemy presence combined with low visibility makes these indoor combat spaces some of the deadliest on the map. ARC heavies often spawn here, and chokepoints restrict movement, leaving almost no room for error.
Recognizing these high-risk zones gives solo and squad players the tactical awareness needed to avoid being cornered and helps build safer rotation paths toward objective zones or extraction points.
Best Resource Hotspots for Efficient Looting
Despite the dangers, the Dam offers several valuable resource hotspots that can drastically improve your loadout if approached carefully. The key is balancing loot density with enemy activity.
Maintenance Warehouses
These areas often yield high-tier ammo, utility gear and medkits. Enemy density is moderate, making them ideal early-run loot spots.
Turbine Service Rooms
Risky but rewarding, these rooms contain heavy ammo, upgrade components and sometimes rare utility devices. ARC heavies patrol here, so clearing the area methodically is essential.
Observation Deck & Upper Walkways
These elevated resource zones offer high-value ranged-weapon ammo and recon equipment. Raider snipers may guard these paths, so players should move with caution and use vertical cover intelligently.
Dam Shoreline Access Points
Loot density is lower but safer, making these sections ideal for players needing quick resupply without major combat. Low-pressure areas like these help solo players maintain combat pacing and recover between fights.
Why Understanding These Zones Matters
Weapon performance, resource management and survivability all depend on how you navigate the Dam. Knowing enemy behaviors, spotting danger zones early and targeting the right loot areas allows you to control engagements instead of reacting to them. Whether you’re preparing a full ARC Raiders Dam Battlegrounds guide or optimizing your personal loadout path, mastering these map dynamics gives you a decisive advantage in both solo and team-based runs.

